F5 BIG-IP as a Terminating Gateway for HashiCorp Consul
Our joint customers have asked for it, so the HashiCorp Consul team and the F5 BIG-IP teams have been working to provide this early look at the technology and configurations needed to have BIG-IP perform the Terminating Gateway functionality for HashiCorp Consul.
A Bit of an Introduction
HashiCorp Consul is a platform that is multi cloud and is used to secure service to service communication. You have all heard about microservices and how within an environment like Consul there is a need to secure and control microservice to microservice communications. But what happens when you want a similar level of security and control when a microservice inside the environment needs to communicate with a service outside of the environment. Enter F5 BIG-IP - the Enterprise Terminating Gateway solution for HashiCorp.
HashiCorp has announced the GA of their Terminating Gateway functionality, and we here at F5 want to show our support for this milestone by showing the progress we have made to date in answering the requests of our joint customers. One of the requirements of a Terminating Gateway is that it must respect the security policies defined within Consul. HashiCorp calls these policies Intentions.
What Should You Get Out of this Article
This article is focused on how BIG-IP when acting as a Terminating Gateway can understand those Intentions and can securely apply those policies/Intentions to either allow or disallow microservice to microservice communications.
Update
We have been hard at work on this solution, and have created a method to automate the manual processes that I had detailed below. You can skip executing the steps below and jump directly to the new DevCentral Git repository for this solution. Feel free to read the below to get an understanding of the workflows we have automated using the code in the new DevCentral repo. And you can also check out this webinar to hear more about the solution and to see the developer, Shaun Empie, demo the automation of the solution.
First Steps
Before we dive into the iRulesLX that makes this possible, one must configure the BIG-IP Virtual server to secure the connectivity with mTLS, and configure the pool, profiles, and other configuration options necessary for one's environment.
Many here on DevCentral have shown how F5 can perform mTLS with various solutions. Eric Chen has shown how to configure the BIG-IP to use mTLS with Slack. What I want to focus on is how to use an iRuleLX to extract the info necessary to respect the HashiCorp Intentions and allow or disallow a connection based on the HashiCorp Consul Intention.
I have to give credit where credit is due. Sanjay Shitole is the one behind the scenes here at F5 along with Dan Callao and Blake Covarrubias from HashiCorp who have worked through the various API touch points, designed the workflow, and F5 Specific iRules and iRulesLX needed to make this function.
Now for the Fun Part
Once you get your Virtual Server and Pool created the way you would like them with the mTLS certificates etc., you can focus on creating the iLX Workspace where you will write the node.js code and iRules. You can follow the instructions here to create the iLX workspace, add an extension, and an LX plugin.
Below is the tcl-based iRule that you will have to add to this workspace. To do this go to Local Traffic > iRules > LX Workspaces and find the workspace you had created in the steps above. In our example, we used "ConsulWorkSpace". Paste the text of the rule listed below into the text editor and click save file.
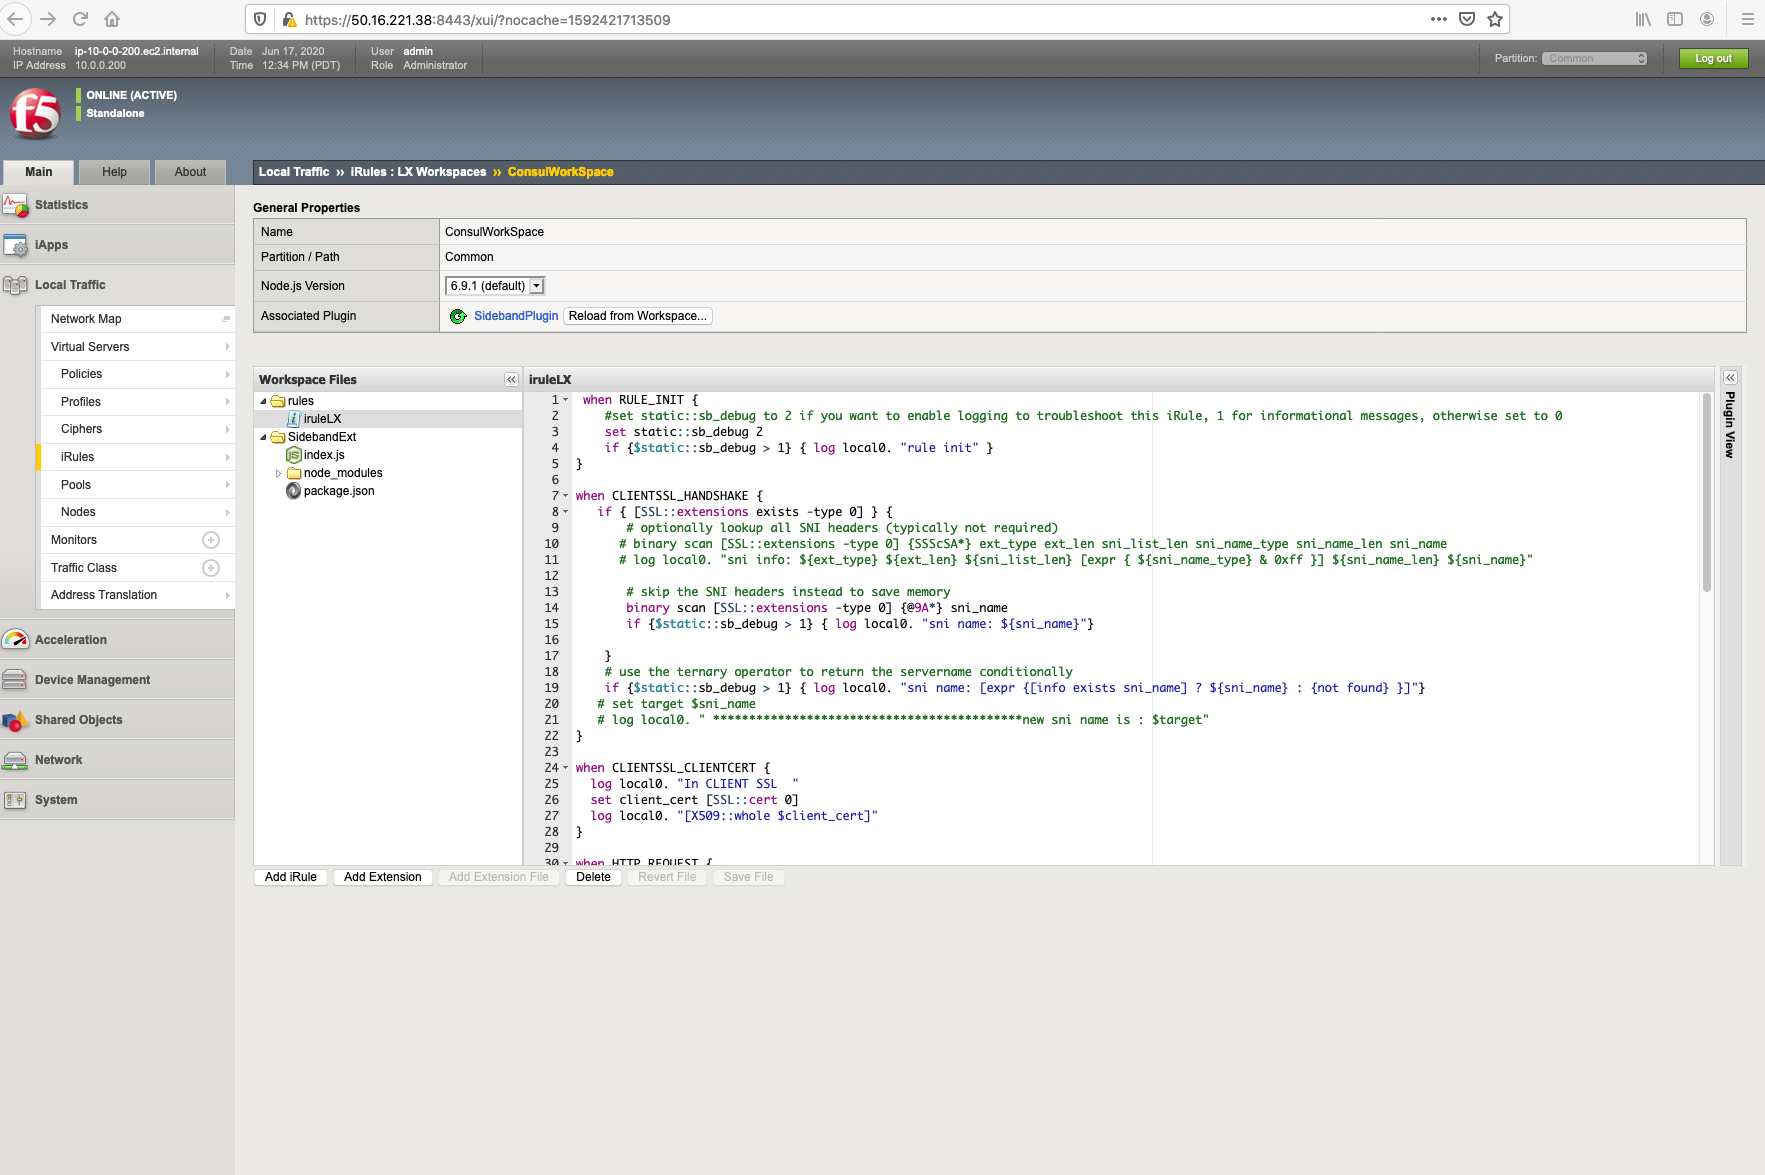 There is one variable (sb_debug) you can change in this file depending on the level of logging you want done to the /var/log/ltm logs. The rest of the iRule Grabs the full SNI value from the handshake. This will be parsed later on in the node.js code to populate one of the variables needed for checking the intention of this connection in Consul. The next section grabs the certificate and stores it as a variable so we can later extract the serial_id and the spiffe, which are the other two variables needed to check the Consul Intention.
The next step in the iRule is to pass these three variables via an RPC_HANDLE function to the Node.js code we will discuss below. The last section uses that same RPC_HANDLE to get responses back from the node code and either allows or disallows the connection based on the value of the Consul Intention.
 when RULE_INIT {
  #set static::sb_debug to 2 if you want to enable logging to troubleshoot this iRule, 1 for informational messages, otherwise set to 0
  set static::sb_debug 0
  if {$static::sb_debug > 1} { log local0. "rule init" }
}

when CLIENTSSL_HANDSHAKE {
  if { [SSL::extensions exists -type 0] } {
    binary scan [SSL::extensions -type 0] {@9A*} sni_name
    if {$static::sb_debug > 1} { log local0. "sni name: ${sni_name}"}

  }
  # use the ternary operator to return the servername conditionally
  if {$static::sb_debug > 1} { log local0. "sni name: [expr {[info exists sni_name] ? ${sni_name} : {not found} }]"}
}

when CLIENTSSL_CLIENTCERT {
 if {$static::sb_debug > 1} {log local0. "In CLIENTSSL_CLIENTCERT"}
 set client_cert [SSL::cert 0]
}

when HTTP_REQUEST {
  set serial_id ""
  set spiffe ""
  set log_prefix "[IP::remote_addr]:[TCP::remote_port clientside] [IP::local_addr]:[TCP::local_port clientside]"
  if { [SSL::cert count] > 0 } {
    HTTP::header insert "X-ENV-SSL_CLIENT_CERTIFICATE" [X509::whole [SSL::cert 0]]
    set spiffe [findstr [X509::extensions [SSL::cert 0]] "Subject Alternative Name" 39 ","]
    if {$static::sb_debug > 1} { log local0. "<$log_prefix>: SAN: $spiffe"}
    set serial_id [X509::serial_number $client_cert]
    if {$static::sb_debug > 1} { log local0. "<$log_prefix>: Serial_ID: $serial_id"}
  }
  if {$static::sb_debug > 1} { log local0.info "here is spiffe: $spiffe" }
  set RPC_HANDLE [ILX::init "SidebandPlugin" "SidebandExt"]
  if {[catch {ILX::call $RPC_HANDLE "func" $sni_name $spiffe $serial_id} result]} {
    if {$static::sb_debug > 1} { log local0.error "Client - [IP::client_addr], ILX failure: $result"}
    HTTP::respond 500 content "Internal server error: Backend server did not respond."
    return
  }
  ## return proxy result
  if { $result eq 1 }{
    if {$static::sb_debug > 1} {log local0. "Is the connection authorized: $result"}
  } else {
    if {$static::sb_debug > 1} {log local0. "Connection is not authorized: $result"}
    HTTP::respond 400 content '{"status":"Not_Authorized"}' "Content-Type" "application/json"
  }
}
Next is to copy the text of the node.js code below and paste it into the index.js file using the GUI. Here though there are two lines you will have to edit that are unique to your environment. Those two lines are the hostname and the port in the "const options =" section. These values will be the IP and port on which your Consul Server is listening for API calls.
This node.js takes the three values the tcl-based iRule passed to it, does some regex magic on the sni_name value to get the target variable that is used to check the Consul Intention. It does this by crafting an API call to the consul server API endpoint that includes the Target, the ClientCertURI, and the ClientCertSerial values. The Consul Server responds back, and the node.js code captures that response, and passes a value back to the tcl-based iRule, which means the communication is disallowed or allowed.
const http = require("http");
const f5 = require("f5-nodejs");

// Initialize ILX Server
var ilx = new f5.ILXServer();
ilx.addMethod('func', function(req, res) {
var retstr = "";
var sni_name = req.params()[0];
var spiffe = req.params()[1];
var serial_id = req.params()[2];
const regex = /[^.]*/;
let targetarr = sni_name.match(regex);
target = targetarr.toString();
console.log('My Spiffe ID is: ', spiffe);
console.log('My Serial ID is: ', serial_id);
//Construct request payload
var data = JSON.stringify({
    "Target": target, "ClientCertURI": spiffe, "ClientCertSerial": serial_id
});
//Strip off newline character(s)
data = data.replace(/\\n/g, '') ;
// Construct connection settings
const options = {
  hostname: '10.0.0.100',
  port: 8500,
  path: '/v1/agent/connect/authorize',
  method: 'POST',
  headers: {
    'Content-Type': 'application/json',
    'Content-Length': data.length
  }
};
// Construct Consul sideband HTTP Call
const myreq = http.request(options, res2 => {
  console.log(`Posting Json to Consul -------> statusCode: ${res2.statusCode}`);

  res2.on('data', d => {
    //capture response payload
    process.stdout.write(d);
    retstr += d;
  });
  res2.on('end', d => {
    //Check response for Valid Authorizaion and return back to TCL iRule
    var isVal = retstr.includes(":true");
    res.reply(isVal);
  });
});

myreq.on('error', error => {
  console.error(error);
});

// Intiate Consul Call
myreq.write(data);
myreq.end();
});
// Start ILX listener
ilx.listen();
This iRulesLX solution will allow for multiple sources to connect to the BIG-IP Virtual Server, exchange mTLS info, but only allow the connection once the Consul Intentions are verified. If your Intentions looked something similar to the ones below the Client microservice would be allowed to communicate with the services behind the BIG-IP, whereas the socialapp microservice would be blocked at the BIG-IP since we are capturing and respecting the Consul Intentions.
So now that we have shown how BIG-IP acts as terminating Gateway for HashiCorp Consul - all the while respecting the Consul Intentions, What’s next? Well next is for F5 and HashiCorp to continue working together on this solution. We intend to take this a level further by creating a prototype that automates the process. The Automated prototype will have a mechanism to listen to changes within the Consul API server, and when a new service is defined behind the BIG-IP acting as the terminating Gateway, the Virtual server, the pools, the ssl profiles, and the iRulesLX workspace can be automatically configured via an AS3 declaration.
What Can You Do Next
You can find all of the iRules used in this solution in our DevCentral Github repo.
Please reach out to me and the F5 HashiCorp Business Development team here if you have any questions, feature requests, or any feedback to make this solution better.